

20 November 2021
Estimated reading time: 2 min
This should help to recover your DroiX® T8 if something went wrong during the upgrade procedure.
This is only for the very first T8 model, if you have a T8-S, T8-S Plus, T8-S Plus v2, T8 Mini or any other variant that is not a DroiX T8, you should not flash this firmware. It will not work and may damage the device.
You will need a Windows-based PC, an SD card (2Gb or larger) and a card reader for your PC
Click the link below to download two files: Win32DiskImager-0.9.5-install.exe and sd_2g_dump_t8.img . Right click each of the two files and select the Download entry, then the Standard Download option.
https://mega.nz/#F!7VsxhYAa!SXEpQ8qBU_jc9pYHY9hI8g
- Plug your SD card into your PC’s SD Card reader (look on the side of laptops)
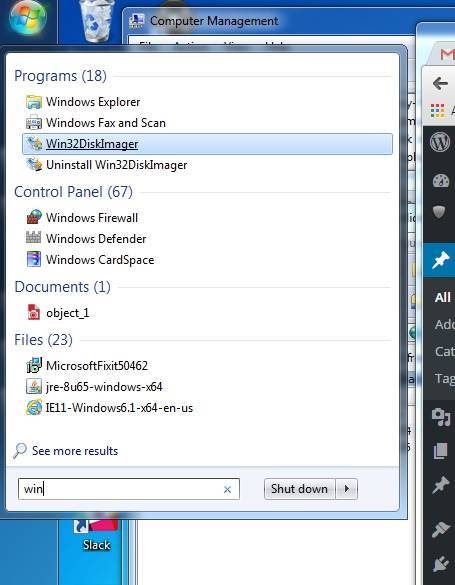
- Open the Win32DiskImager file you just downloaded and proceed with the installation
- Right click on the freshly installed Win32DiskImager program and select Run as Administrator (in Windows 10, select the “More” menu first)

- Click the blue folder icon and navigate to the download folder where you stored the sd_2g_dump_t8.img file. DO MAKE SURE the card reader is selected in the Device drop-down box (in the exampe below, the F:\ drive has been chosen)
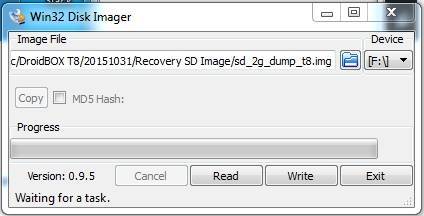
- Click the Write button and wait for the process to complete
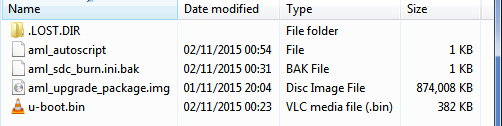
- Once the process has completed, check the contents of your SD card, they should now show these file:
- Safely eject the SD card from your PC and plug it into your T8
- Switch OFF your DroiX® T8 device
- Press and HOLD the reset button on the right hand side of the device
- Press the power button once whilst STILL holding the reset button
- Release the reset button after 6 seconds
- Leave the device for 2 minutes (the screen should still be black at this stage)
- Switch off the device and take the SD card back to your computer.
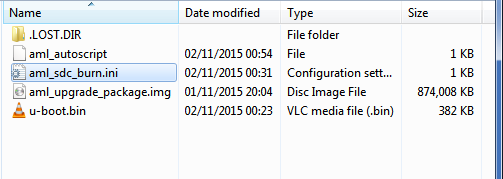
- Rename the file aml_sdc_burn.ini.bak to aml_sdc_burn.ini that is to say you remove the tSling .BAK extension leaving just .INI . Now it should look similar to image below:
- Again safely eject the SD card and insert it back into your (turned off still) T8
- Press and hold the reset button on the right hand side of the device
- Press the power button once while holding down the reset button
- Release the reset button after 6 seconds
- It should start the upgrade procedure
- Wait while it finishes and then switch off your T8
- Take the SD card out and turn it on
- Now wait while device boots. As usual, complete any setup screens offered.
- DO NOT TURN YOUR DEVICE OFF FOR TWENTY MINUTES PLEASE
All done. Thank you for your patience
