
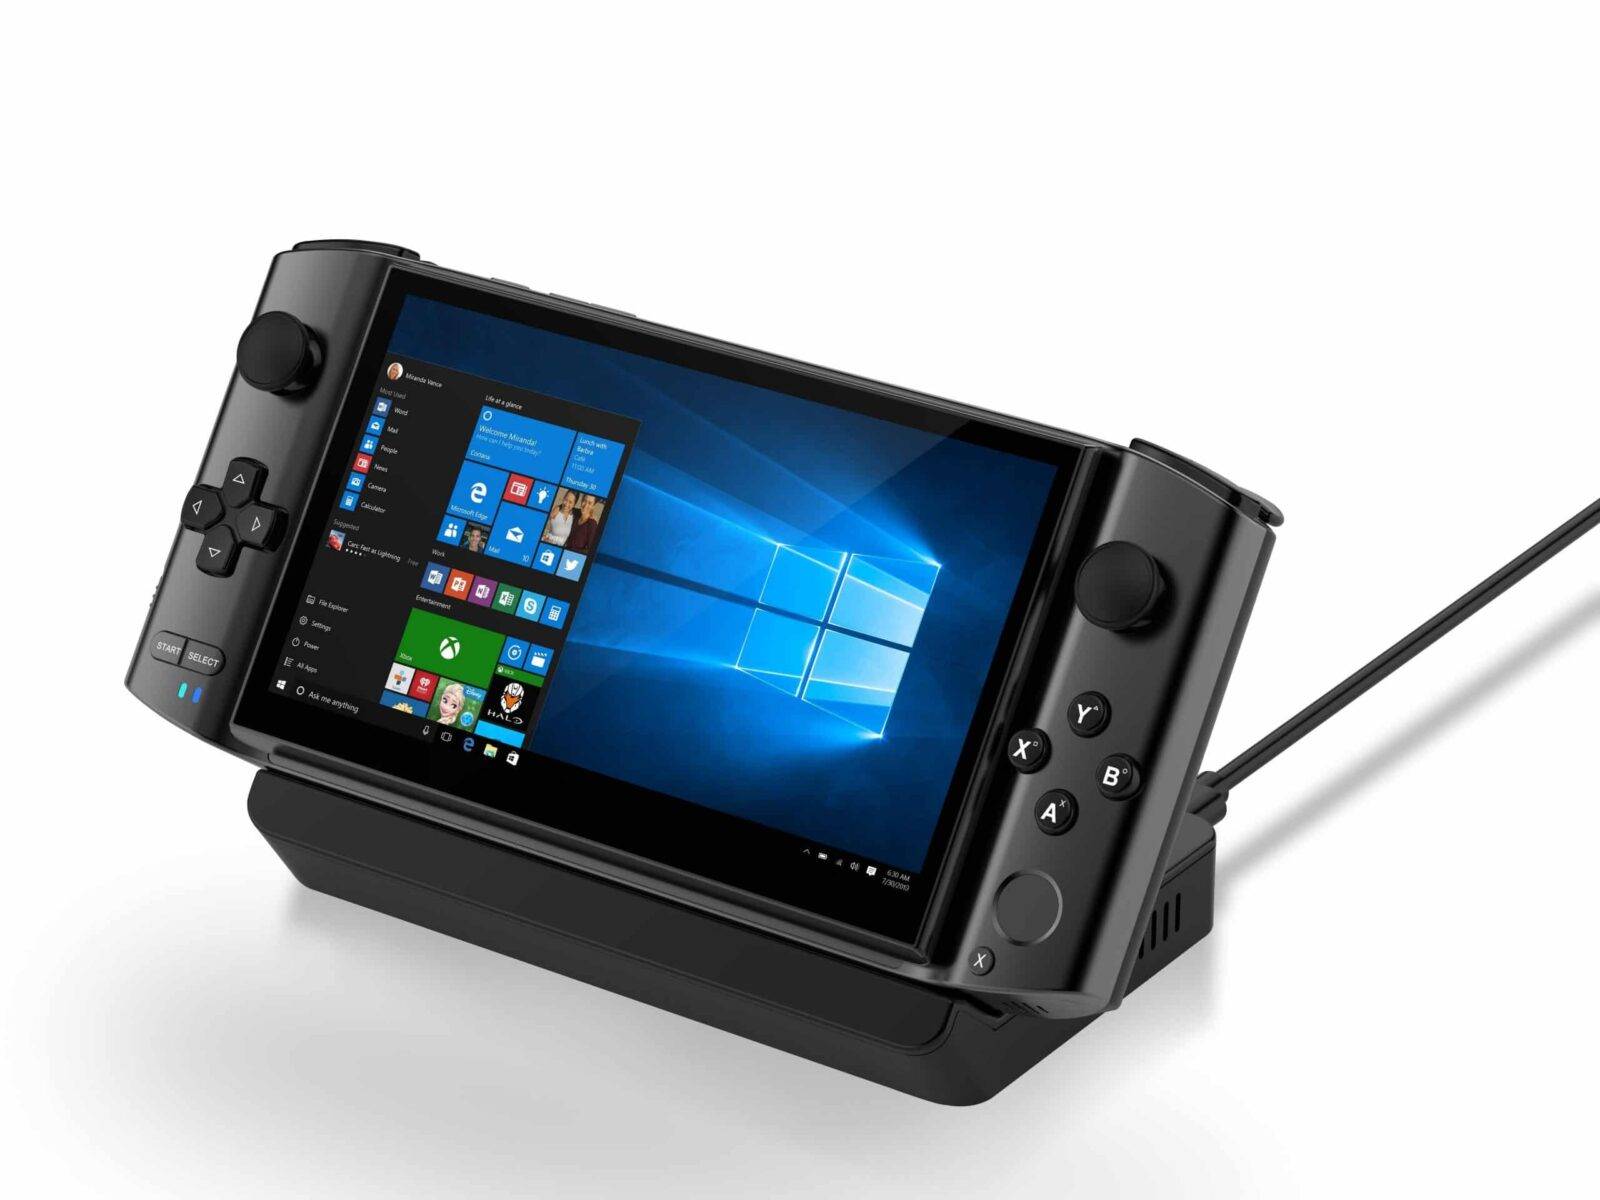
So you tried a factory reset, but that didn’t fix your issue? The next step in troubleshooting your GPD Win 3 would be to re-flash the firmware for the device. (Or in other words: reinstall Windows on the GPD Win 3).
You will need:
- A 16GB (or greater) USB Flash Drive
- A PC capable of downloading files
DISCLAIMER: This will remove all data from the GPD Win 3. Back up any data or files that you do not wish to lose.
Step 1: Prepare a bootable USB
The first step is to prepare the USB to be used for reinstallation. This is done through formatting your USB drive.
How you do this does not particularly matter (you can use Window’s built-in file formatting system, or a third-party application), however, it is important that you make sure that two parameters are correct:
- The partition must be called “WINPE”
- The partition must be in the NTFS file format.
If either one of these parameters is not met, the USB will not be bootable.
Step 2: Download the Files for the GPD Win 3
First you’ll need to download the actual firmware. You have two choices here:
You can download the firmware as-is the way GPD provide it. Here’s the link: https://go.droix.net/GPD-WIN-3-FW-FILES
Or you can download a pre-made image file by us. Here’s the link: https://go.droix.net/GPD-WIN-3-FW-IMG
Step 3a: Copy the files
If you downloaded the firmware files as-is, all you need to do here is copy the firmware files over to the root of the USB drive.
First, extract the zip file you have downloaded. You can either use the native tools in Windows, or you can download a third-party tool (we suggest 7zip).
Once extracted all the files and right click -> copy, then navigate to the USB drive and right click -> paste. (You can also CTRL+C -> CTRL+V, or cut and paste instead; whichever you prefer!)
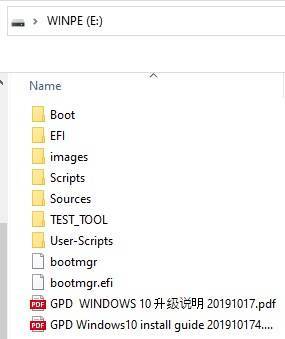
Once copied over, the USB stick’s contents should look something like this:
Your USB is now ready for re-flashing. You can skip step 3b, as it is concerned
Step 3b: Flash the USB
If you’ve downloaded the image file we prepared, you’ll also need to download a USB flashing tool. We personally prefer Win32 Disk Imager, but there are alternatives you can pick from such as Rufus, or ApplePi Baker (for Macintosh users).
Win32 Disk Imager is a lightweight, powerful, and easy-to-use tool for both creating .img files from USB.
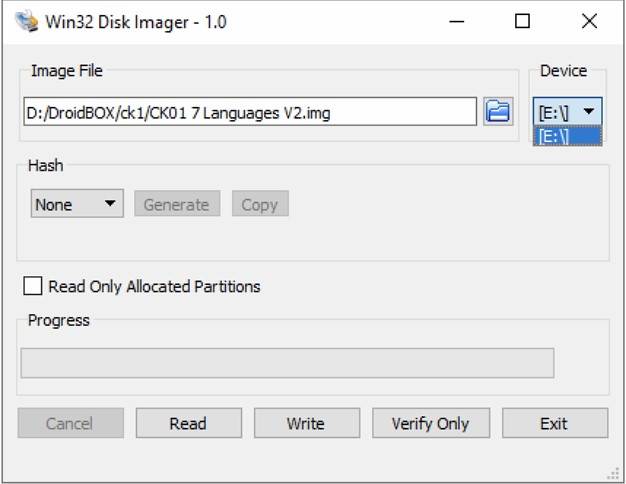
Make sure your USB drive is inserted, and you have the image file downloaded.
Under “Device”, select the drive letter that corresponds to the USB drive. If there is only one Hard Drive/Solid State Drive in your computer, the USB will probably automatically be assigned the drive letter D:\ , but make sure to check!
Under “Image File”, navigate to the image you downloaded previously. It doesn’t really matter where its saved, as long as you can find it (and it won’t be moved during this process)
Then, click “Write”, and the process will begin. This will probably take around 30 to 60 minutes depending on the speed of your computer and the connected USB ports (you can use the PC for other things in the meantime, just make sure not to disconnect the USB drive, add/remove any files to the USB drive or close the application!).
When the bar is filled and you get the popup informing you that the imaging is complete, it’s safe to remove the USB drive.
Step 4: Boot into the USB on the GPD Win 3
Finally, you must boot into the USB you have made in either of the two previous steps.
To do this, insert the USB into the USB port at the top of the GPD Win 3. Then power on the device and repeatedly press the F7 key to access the boot menu.
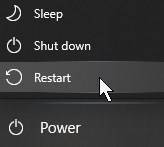
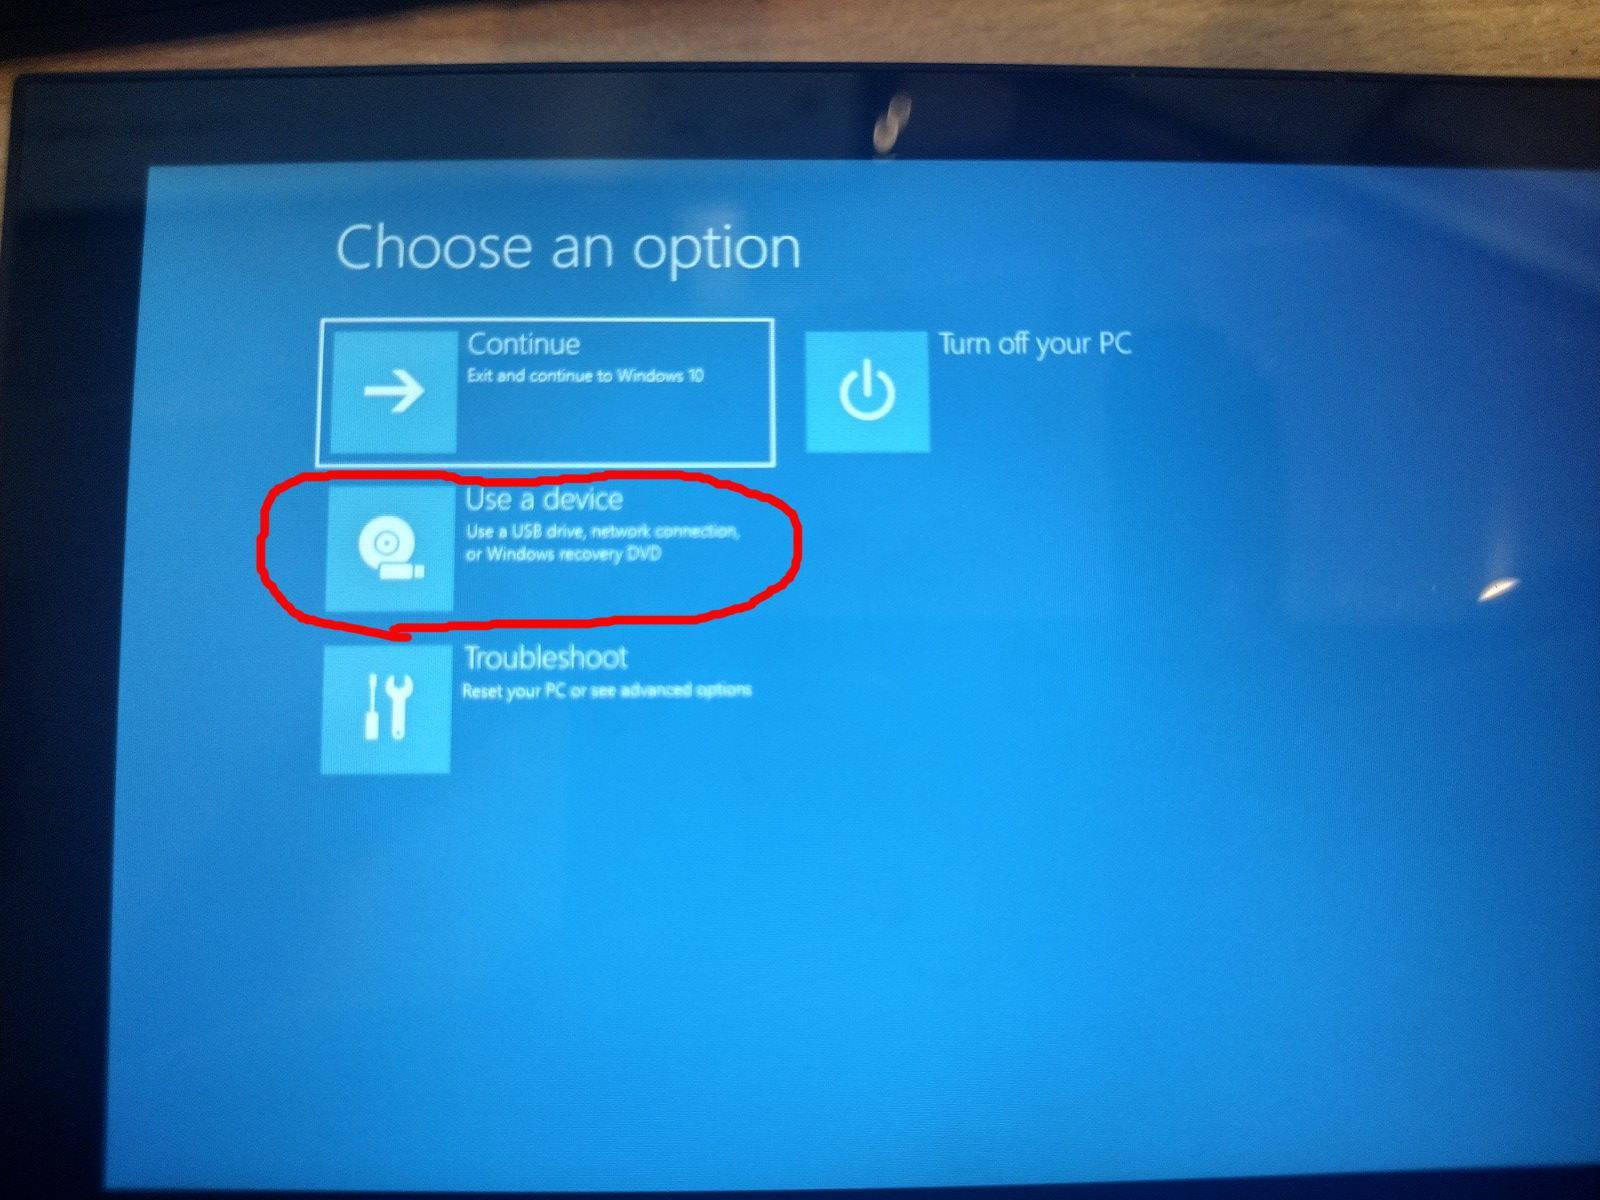
We find that this is inconsistent however due to the speed at which the device boots up (making it difficult to hit the window). If you can’t do this, you can instead enter windows, open the start menu, then hold the SHIFT key while selecting “Restart”.
Select “Use a Device” from the menu that appears, and then select the device that corresponds to the USB you have used. For example: if you have used a Kingston USB, it might be called something like “Kingston DataTraveller”.
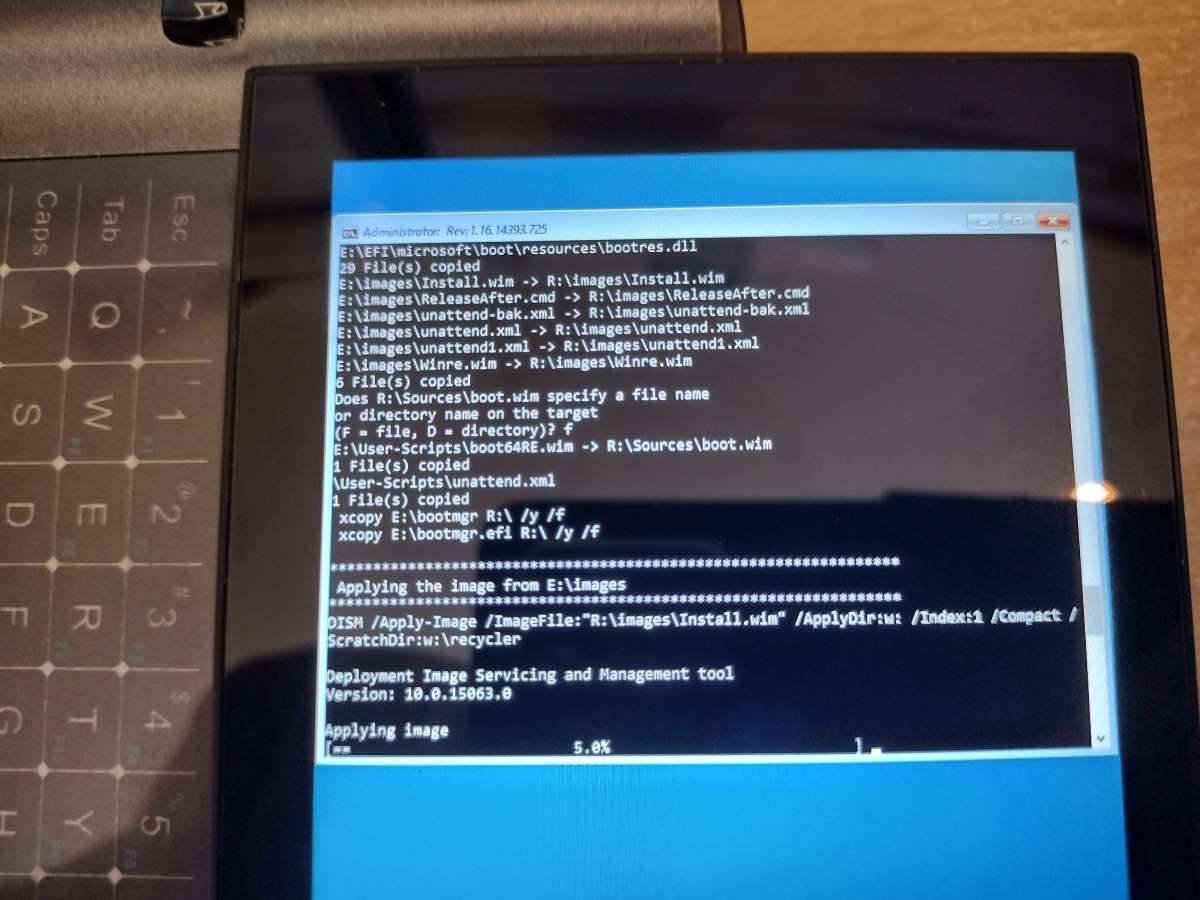
The re-installation process will now proceed automatically. You’ll be met with a command line interface on a blue background like this, as the system performs the necessary steps to wipe your device and reinstall Windows.
Once completed, the system will reboot automatically into a fresh install of Windows (it will not turn off after installation)!
Now your system has been re-flashed. Enjoy your fresh install of Windows!
Thank you for reading thus far. For more tips, tricks and guides relating to the GPD Win 3, check back on our blog regularly for the latest updates! And if you’re interested in purchasing a GPD Win 3 of your own, check out our main site, where we currently list both versions of the GPD Win 3!
Until next time!
