
Hello! In this article, we’ll be going over how you can reset your mini pc or handheld gaming pc.
There may come a point in the process of using your mini PC or handheld gaming PC where you simply want to… start over! Maybe you’ve botched an update of some kind. Maybe you’re preparing it to resell or pass on as a gift.
Whatever the reason, knowing how to reset your device without needing to reinstall anything is a useful technique to know.
UEFI OS vs Native Windows
When it comes to Windows-powered devices, there are typically two methods of performing a factory reset.
- Restting the device via the native Windows utility (“Reset this PC”)
- Resetting the device via a manufacturer-developed “recovery partition”
In this article, we’ll go over how you access both, as well as the postives and negatives of either method
via Native Windows Utility
Natively resetting the device through Windows is something just about EVERY Windows device, and is a built-in feature of the operating system.
To access this utility, simply search “Reset this PC” in the Windows search bar.
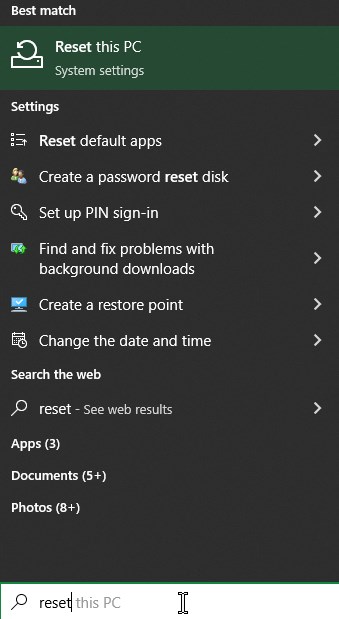
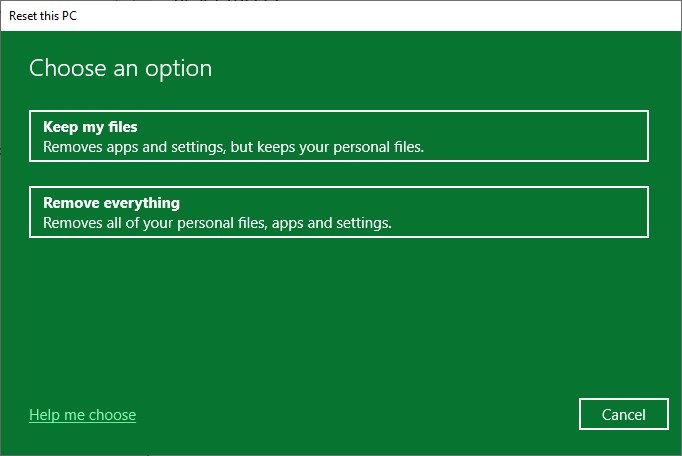
Upon starting up the utility, you’ll be given the option to keep your personal files (i.e., photos, documents, etc.), or to remove everything.
While this handy utility is universal – it does take substantially longer than just reinstalling windows, or performing the process via the second method.
via Recovery Partition
This second method of resetting is not universal, and is instead dependent on the specific installation of Windows and the manufacturer of the device.

Some devices feature a second partition on the hard disk which contains a utility that can wipe the device’s main partition. These utilities are very basic in nature and consist of a basic “reset” button in a blue background.
Depending on the device’s age, some devices that may include this are:
- One-Netbook products – including the ONEXPLAYER 1S
- GPD products — most commonly found in the original GPD WIN MAX and onwards
To access this, you’ll need to find a way to boot the device into the partition.
- You can either enter the BIOS or boot menu during start up, and select the partition
- Or you can enter the Windows Advanced Startup Settings
Entering the BIOS/Boot Menu
The exact steps for this will vary depending on the device you’re using.
Most commonly, the way to do this is to press F7 while the device is powering up. You will know you’ve been successful when a blue window appears.
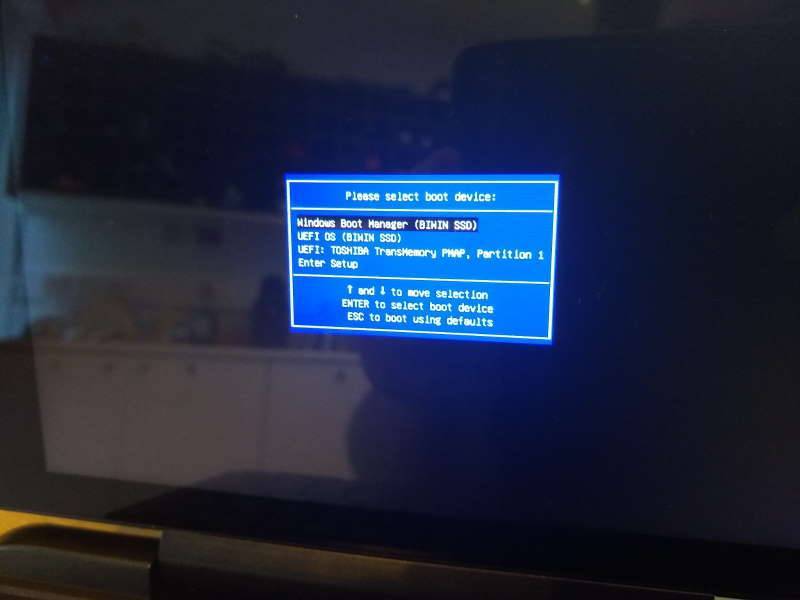
You can also enter the BIOS by pressing ESC, F1, F2 or whatever the specified key is for your device. From the BIOS, you’ll be able to navigate to the boot options via your keyboard and select the drive of your choice.
In most cases, the partition will be called “UEFI OS”, although it may be different depending on the device.
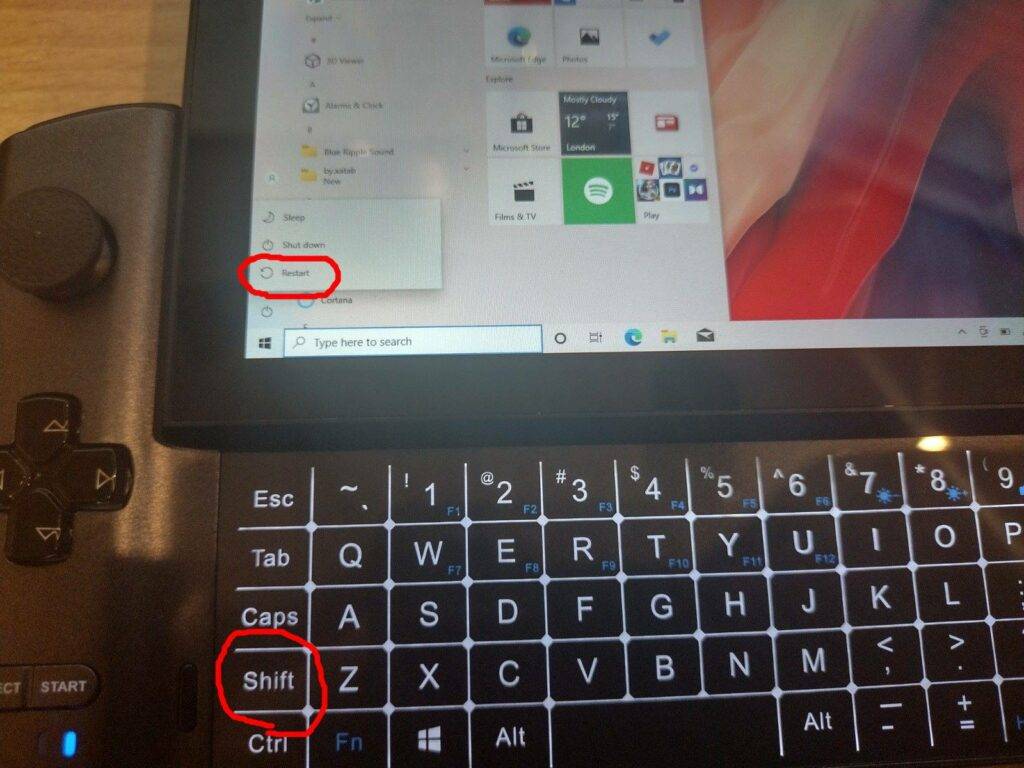
Advanced Startup Menu
The quickest way to enter the advanced startup menu is by holding the LEFT SHIFT key, and then selecting the restart option from within the Windows start menu, like so:
You’ll see a number of options, but the one you should pick is “Use a device”.
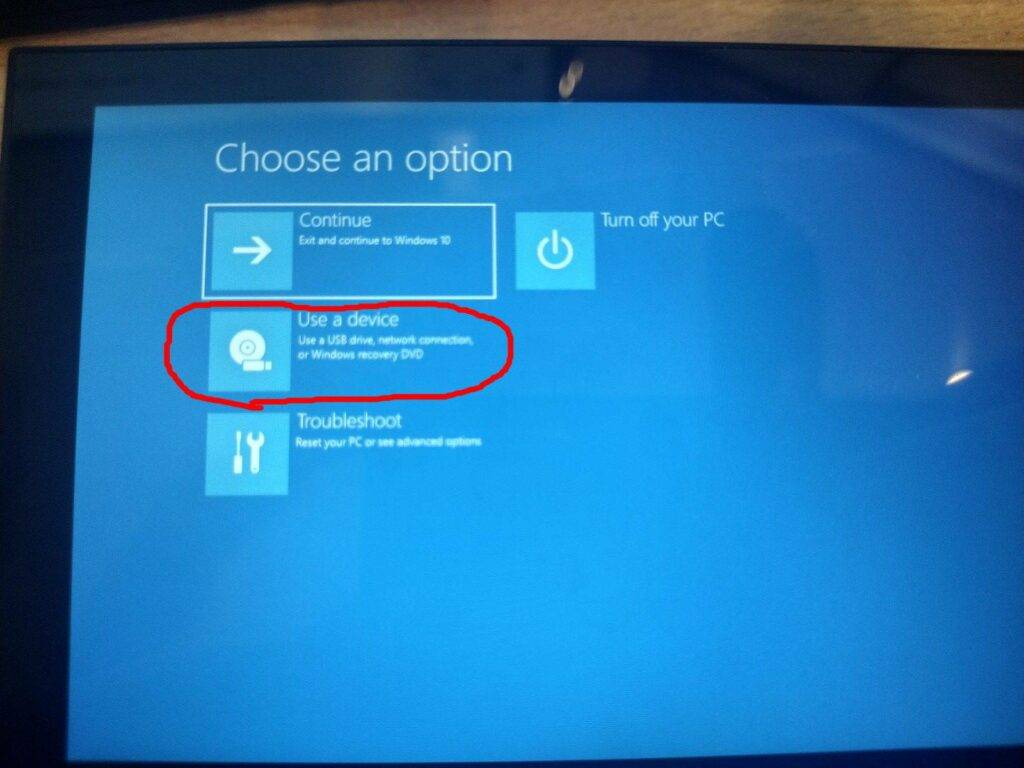
Select UEFI OS from the list of options here (there may be a large number of different options, depending on how your hard drive is partitioned and/or what USB devices you have connected.
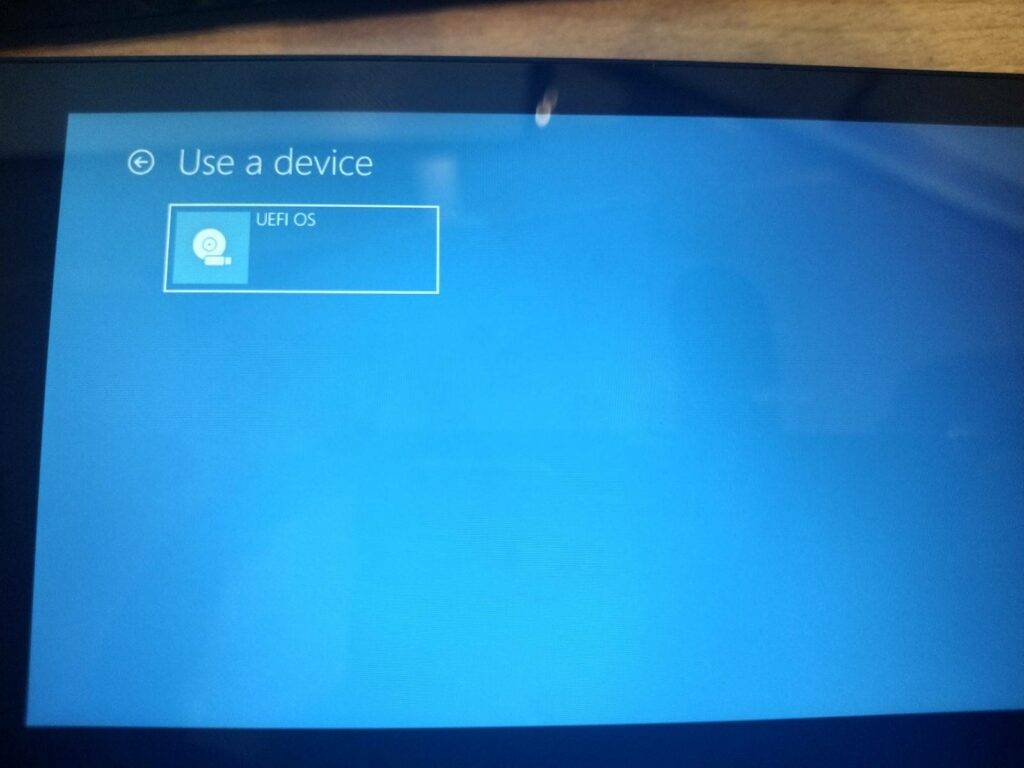
The system will now reboot into the recovery partition. From here, you can begin the reset process — which is entirely automatic, although you will either need to connect a charger, or ensure that the battery is over a certain percentage before it will start.
After about 15-20 minutes, the reset should finish. The system will then reboot into a fresh install of Windows!
