
Hello! In this guide, we’re going to be showing you how to install 351Droid. A port of LineageOS (an open-source Android 11 distribution) to the ANBERNIC RG351P retro gaming handheld.
Please note that this process will completely wipe your microSD clean of data. We would highly advise purchasing a secondary microSD card to install this on, in case you change your mind after using it.
Disclaimer: We at DroiX are not liable for any loss of data, hardware, or otherwise as a result of the installation of this third party operating system. This process should only be carried out at your own discretion.
Table of contents
#1: Format your SD Card
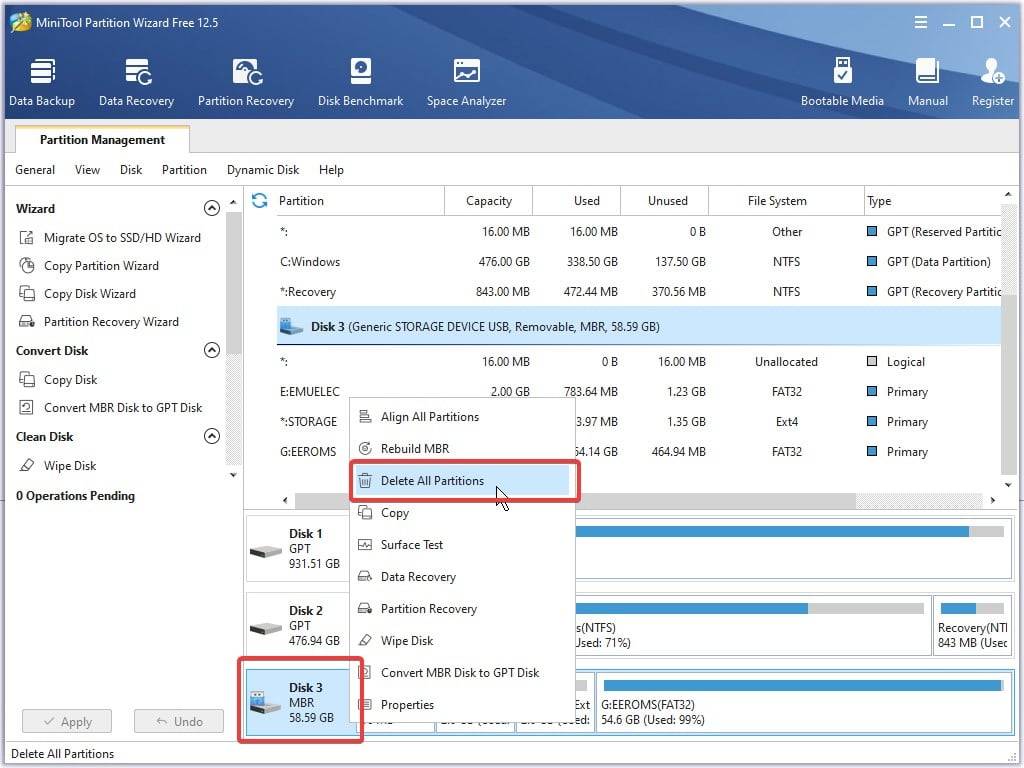
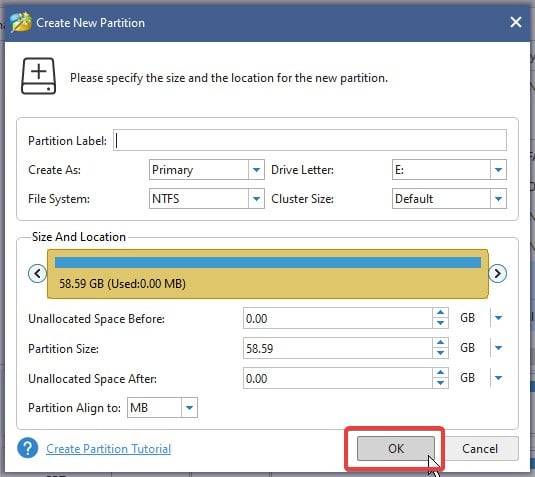
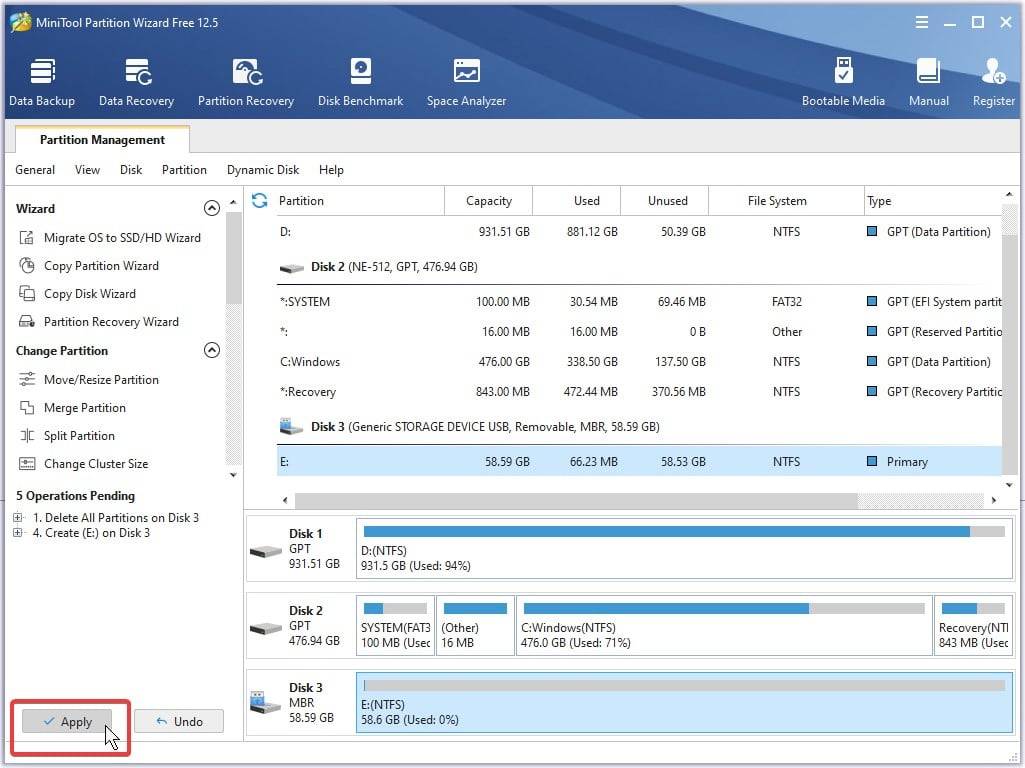
You will need to clear up an SD card before proceeding with the installation. Ensure that the entire card is one solid partition, otherwise errors may potentially occur with the installation.
You can do this via any method you wish. We prefer MiniTool PartitionWizard as it’s free and easy to use.
See the below slideshow for the process of completely wiping a card in preparation for flashing.

#2: Flash The MicroSD Card
You can grab the 351Droid image from this link.
Once you’ve downloaded it, extract it using file compression software of your choice. We recommend 7zip, as it is free, open-source, and lightweight.
After extracting the image, you will need to image the microSD card. There are multiple tools you can use to do this such as:
- Win32 Disk Imager
- Rufus
- ApplePi Baker (for Apple users)
We’ll be using Win32 Disk Imager as it’s the simplest of the three to use.
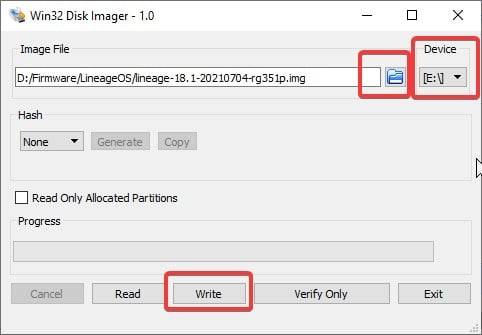
Click the blue folder icon to select the image file you have downloaded.
Ensure that the “Device” matches the drive letter of the microSD card you are flashing the firmware to.
Once sure, click “Write”, and the process will carry out automatically.
#3: Boot the device
Be patient during the device’s first boot, as it will take a while.
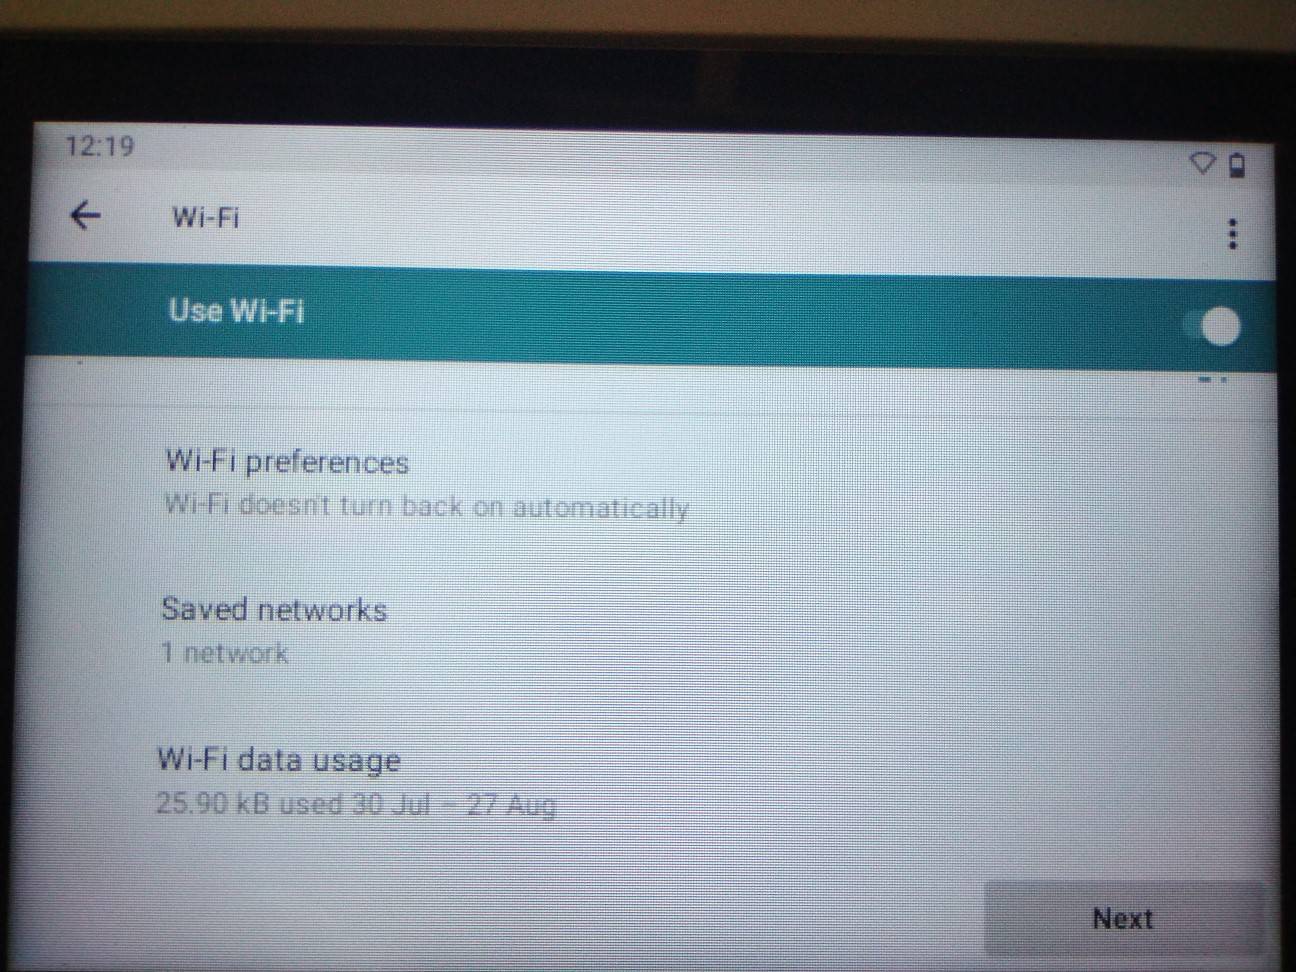
Once the device has booted, you’ll be bought through a standard setup for Android, involving you setting your timezone, Wi-Fi, and other things.
And there you have it! Android 11 on your RG351P!
Tips:
Expect Bugs
351Droid is a community developed application put together by the hard work of many amazingly talented people.
It is, however, a hobby project that said people work on in their spare time. So do not expect everything to function perfectly.
If you experience any bugs or issues running 351Droid, we would advise joining the Retro Handhelds discord and asking in their #351droid_support and #351droid_bug_reporting channels.
Connect a Mouse & Keyboard (during setup, at least)
Due to the lack of mouse navigation, you will NEED to connect a mouse/keyboard in order to more accurately navigate the Android OS and tweak certain settings.
Once you’re done with the setup and have all your apps and games in place, you can then remove the keyboard/mouse.
Don’t bother installing the Play Store
The RG351P and RG351M simply do not have the raw specs to run the Play Store comfortably, let alone on Android 11.
To quote the developer:
Play Store is a resource hog
Turtle – 01/08/2021 – Retro Handheld Discord Server #351droid_support
In combination with the fact that we’re working with SD Cards (low read/write speeds), 1GB of ram (2GB of ram is basically the minimum requirement for Android 11 at this point), and that the processor isn’t the most high end, play store just doesn’t work out well
With that in mind, we highly advise against bothering with installing the Play Store.
If you want to download apps (emulators, etc.), you’ll need to grab the .apk files directly from the web. The safest sites for doing this are large APK rehosting sites such as APKPure and APKMirror.
