
In this article
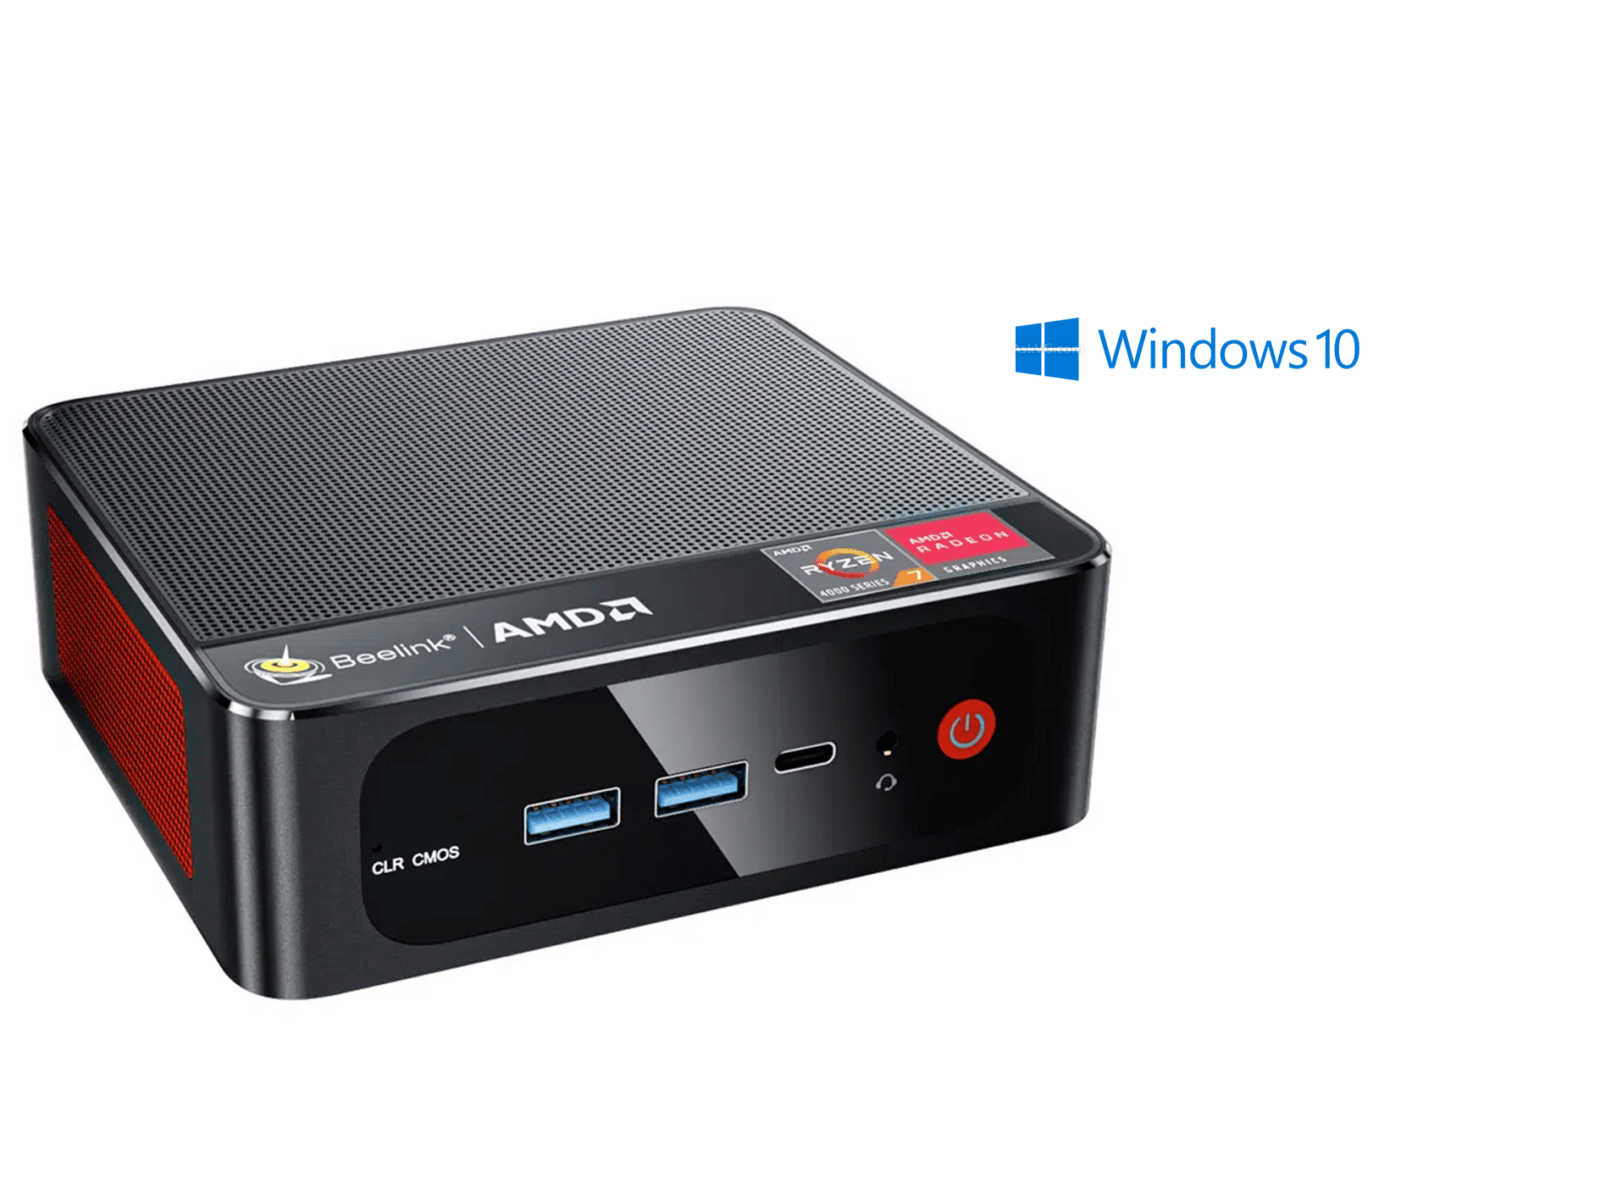
Today we’re going to cover how to reinstall windows on various Beelink Mini PC’s.
You might want to do this as part of a troubleshooting process, or you may simply wish to perform a bout of “spring cleaning” to revitalise it. Whatever the reason, this guide is here for you!
While ultimately very similar, the Windows installation on these devices is slightly different from a generic Windows 10 installation. In a pinch, you can just grab the installation tool from Microsoft’s website, but some things may not perform as expected due to the absence of certain drivers.
For that reason, we suggest reinstalling using the firmware from Beelink themselves.
You will need:
- A USB Memory Stick of at least 10GB in size
- A PC for preparing said USB
- Win32 Disk Imager
- The firmware for the device, which you can find in the table below:
| Model Name | Firmware Link |
|---|---|
| AP45 | Home |
| T45 | Home |
| L55 | Home |
| U55 | Coming Soon |
| X55 | Home |
| BT3-X | Coming Soon |
| J45 | Home |
| U57 | Home |
| MII-V | Home |
(We’ll be uploading image files in the coming days/weeks!)
Preparing the USB Stick
Download Win32 Disk Imager here: https://sourceforge.net/projects/win32diskimager/
(Or if you know what you’re doing, any disk imaging software will suffice, really.)
Once you’ve downloaded it, install it, and start it up. You’ll be met with a menu like this:
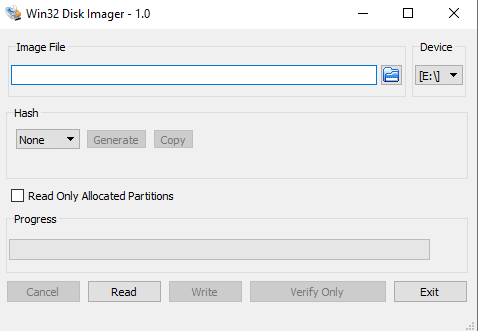
Click the blue folder icon, then navigate to the folder you’ve downloaded the firmware image file to (see the previous section). Select the firmware file, and you’ll see the path automatically be filled in.
Then make sure that the correct “device” is selected (the drive letter should match your USB), then click “Write”).
DISCLAIMER: This will delete the existing contents of the USB. Be warned.
The imaging process will begin automatically. You can use your PC as normal during this time, but make sure that:
- The image file is not moved or otherwise modified during this process
- The USB is not disconnected from the PC during this process
- The application is not closed during this process
Otherwise the imaging process will fail, and you’ll need to start again. When finished, a popup will appear informing you of the success. You can then safely close the application.
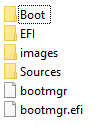
Now your USB stick is formatted, it should be called “WINPE”, and the contents should look similar to this:
Your USB drive is now ready for use. You can keep it lying around so you can quickly reinstall to one or multiple systems too, if you’d like.
Installation
With your USB drive ready and inserted into any free USB port on the device, power it on and press F7 on any attached keyboard while it boots up. If successful, you should be met with the Boot Menu (if you aren’t, restart the computer and try again).
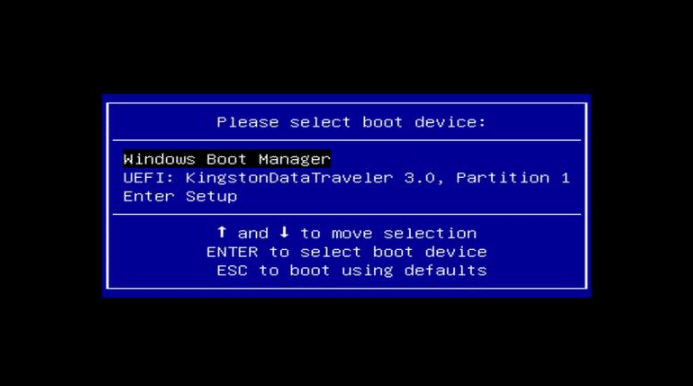
Select the UEFI option from he list of devices (the exact name will differ depending on the USB stick you use).
The installation will now proceed automatically.
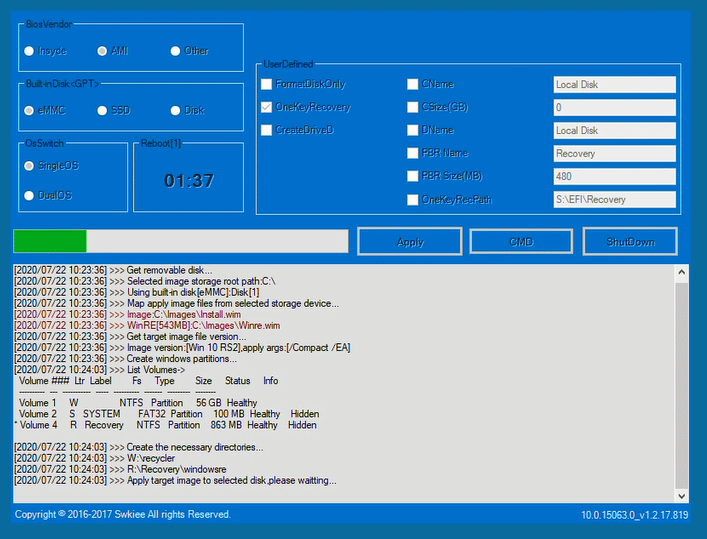
(We don’t suggest touching anything on this window unless you know what you’re doing!)
(However, if the installation fails due to not finding a drive – try selecting “eMMC” from the radio buttons in the top left, then clicking apply)!
When completed, the computer will boot into a limited administrative account known as “System Preparation Mode”. After you’ve performed whatever quick checks you wish, select “OK”, and the system will reboot into the regular Windows 10 setup screen.
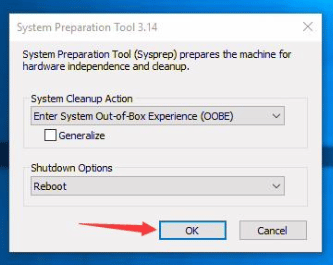
(Alternatively, you can change the option from “Reboot” to “Shutdown” if you wish to start up the PC later).
Thanks for following along with our guide. If there’s anything you’re not quite sure about, feel free to leave a comment, and we’ll get back to you as soon as possible!
You can also check out our range of NUC PC’s on our website.
