

In this article
In this guide we’ll be showing you how to update the firmware for both the GT King and it’s successor, the GT King Pro.
You can also use this as a troubleshooting technique in case you find that your device is displaying issues.
Disclaimer: Following these instructions will restore your device to the factory settings. And remove all personal files/apps. Please back up any important files, before proceeding.
The first thing you’ll need to do is confirm your device’s serial number. There have been small hardware adjustments between batches of GT King models, meaning that they require specific firmware files.
You can find your serial number by looking on the underside of the device, next to the barcode. We’ll only be paying attention to the first few digits of the number.
The updating steps are near identical between the two devices, so just make sure you have the right firmware.
GT King Pro Firmware
Please only make sure to use firmware that matches your serial number. If your serial number is not present, please leave a comment!
| Serial Number | Firmware Link |
| C92H / S92H / SB9H | Here |
Note: By the time you are reading this, there’s a good chance the above link contains outdated firmware. For the latest firmware, you can grab the files from Beelink’s own forum at http://forum.bee-link.com/forum.php?mod=forumdisplay&fid=189
GT King Firmware
Please only make sure to use firmware that matches your serial number. If your serial number is not present, please leave a comment!
| Serial Number | Firmware Link |
| C92X / SA9H / SB9H | Here |
Note: By the time you are reading this, there’s a good chance the above link contains outdated firmware. For the latest firmware, you can grab the files from Beelink’s own forum at http://forum.bee-link.com/forum.php?mod=forumdisplay&fid=197
Updating Via USB (Burning Tool)
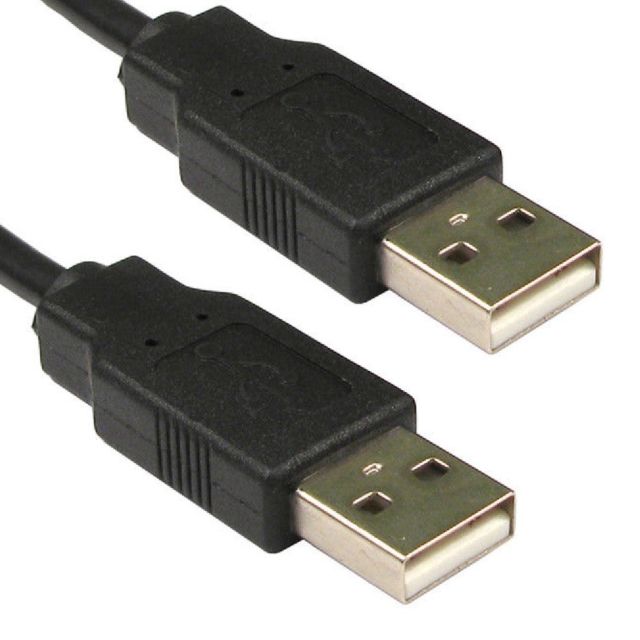
To update your device via USB, you’ll need a Windows computer, and a male-to-male USB cable, like so:
You’ll also need the Amlogic USB Burning tool, which you can download here.
Install the Burning tool,, then start it up. You’ll be met with an interface like this:
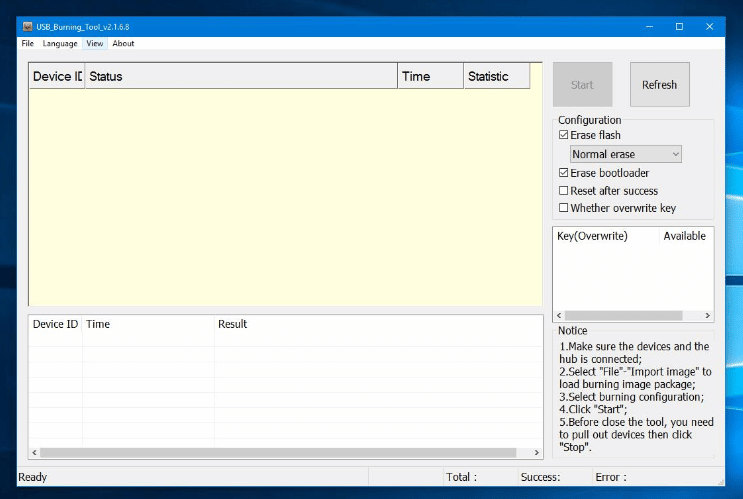
In the top left corner, click “FIle” and then “Import Image”

Find the image file you downloaded previously, and open it. It may take a while to load, so just be patient! Once it’s loaded, click “Start”.
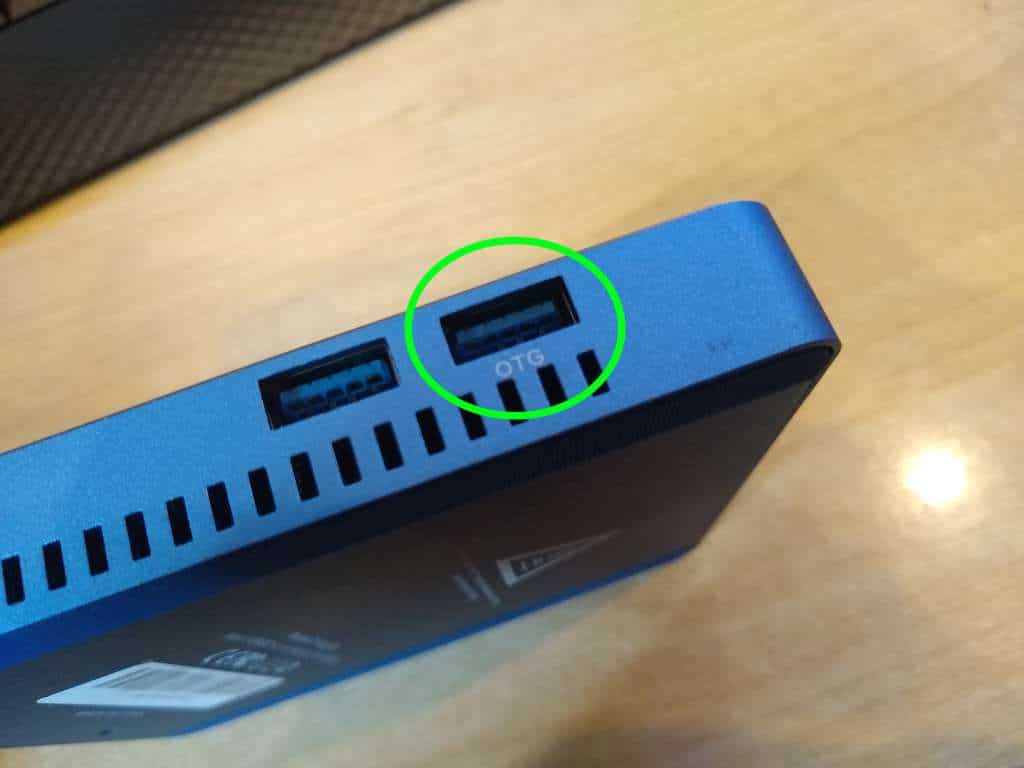
Now connect one end of the USB cable into your PC, and the other end into the appropriate USB port on the device (see below for images).

Now the flashing process has begun. We highly suggest you do not connect any additional devices during this period, as you could potentially end up corrupting the contents of an unintended device.
Once the bar is filled, the update is complete, and you can now boot up your newly-flashed GT King.
Updating Via SD Card (OTA)
You can also update your device via an SD card, if you wish to do so.
For the GT King, you’ll need a microSD card. For the GT King Pro, you’ll need a full-sized/regular SD card. In both cases it must be at least 4GB in size.
You will also need some method of both accessing and modifying the contents of the SD card. You can use a USB card reader, or perhaps your laptop/computer may already have an SD card/microSD card slot built in.
First, we’ll need to format the SD card as FAT32. To do that, insert the card into your PC, right click the SD card in Windows File Explorer, and select “Format”.
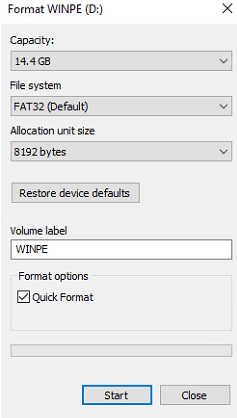
Make sure that FAT32 is selected as the File System, and that Quick Format is ticked. Then click Start. There’s no need to change anything else.
Now, in the file you’ve downloaded, drag and drop the contents of the sd_card folder onto your SD card. There should only be three files on the SD card now:
- factory_update_param.aml
- recovery.img
- and the OTA zip file itself
(Depending on the Firmware, there may be less – as long as the OTA zip file is present at least, this is fine)
Now, insert the SD card into the GT King/Pro, and then turn it on.
Once turned on, select the icon with six white dots inside of a grey circle.
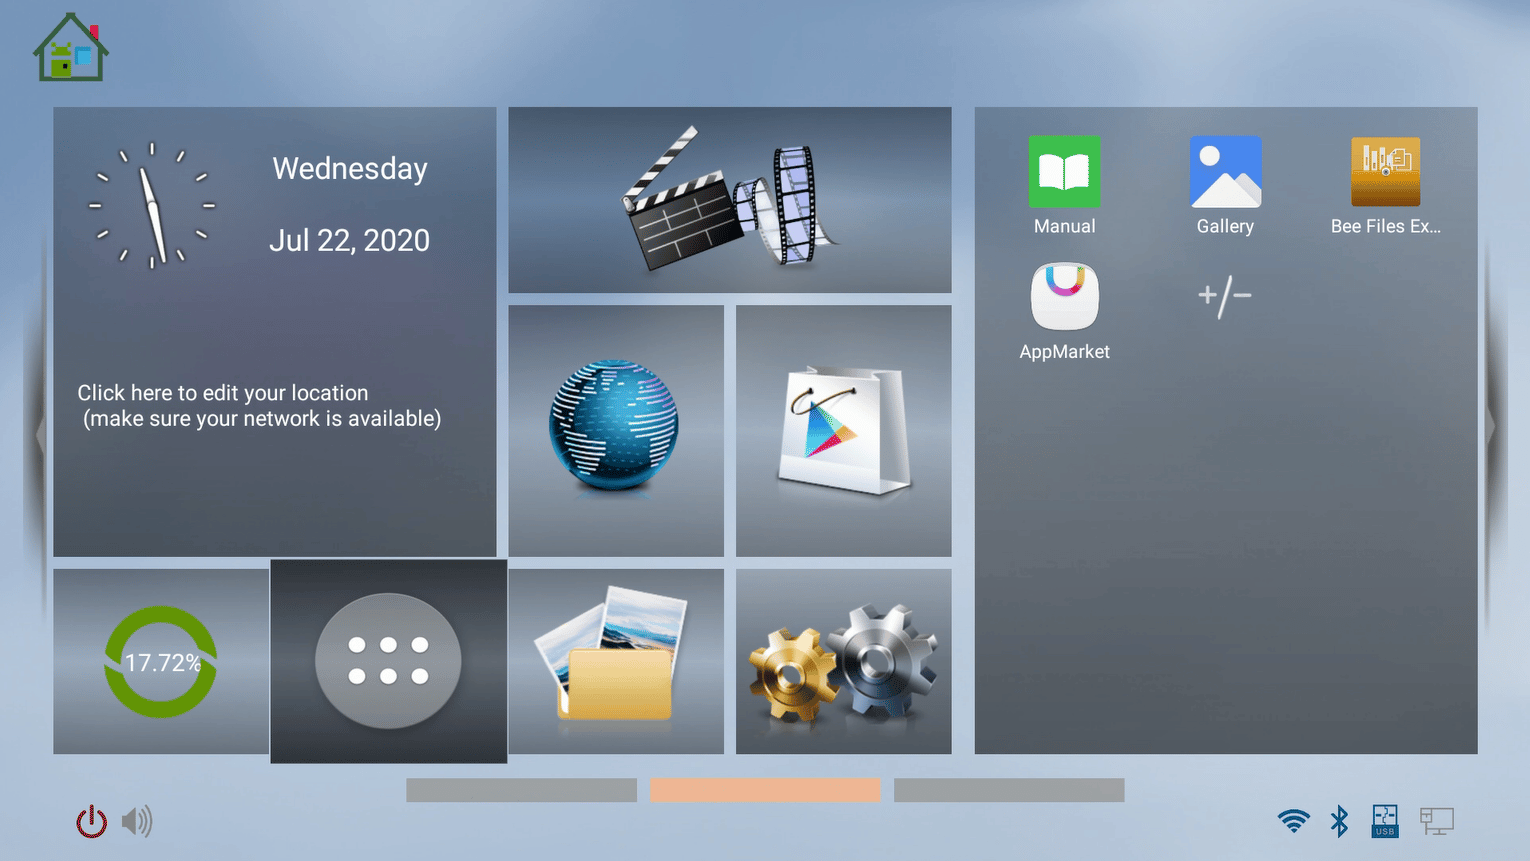
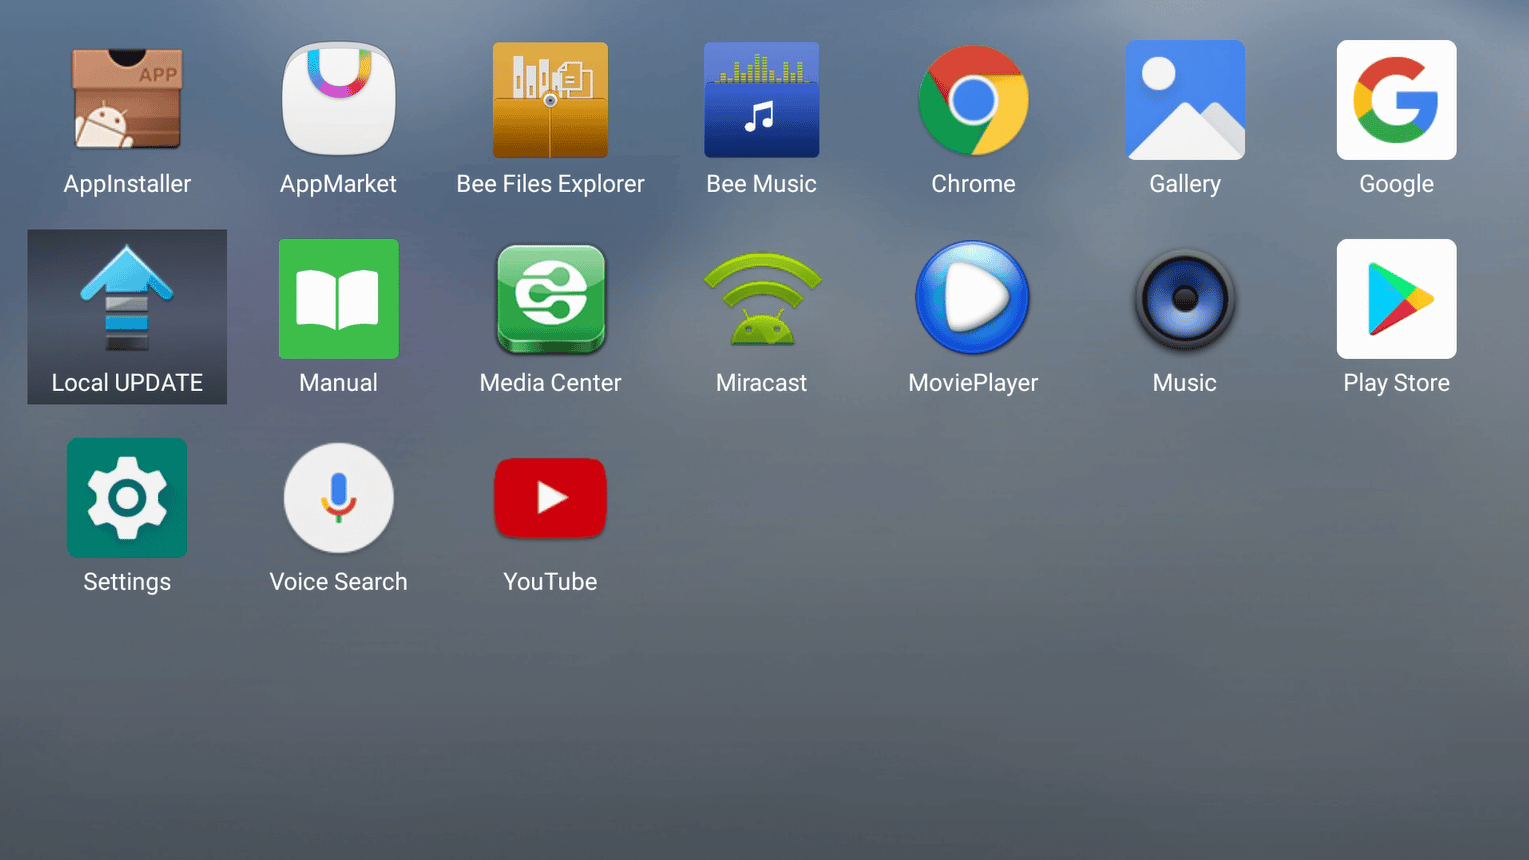
You’ll be taken to the list of apps on the device. Select “UPDATE&BACKUP” (It may also be called “LOCAL UPDATE)
Press the “Select”, and choose the OTA zip file from the list of zip files found on the device.
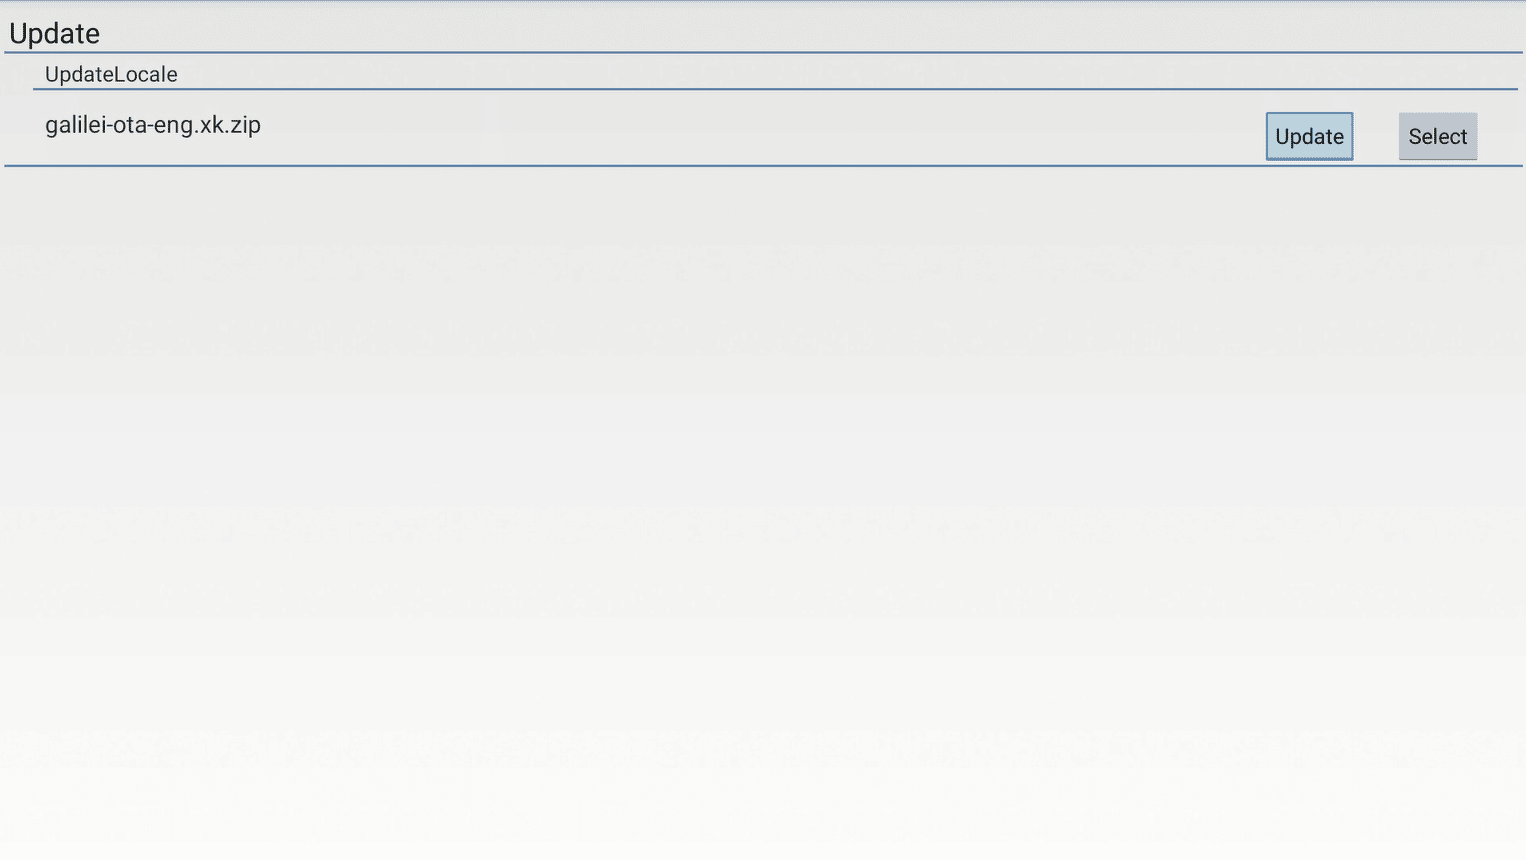
Now select “Update” (if prompted to confirm, just press update again), and the update will proceed automatically.
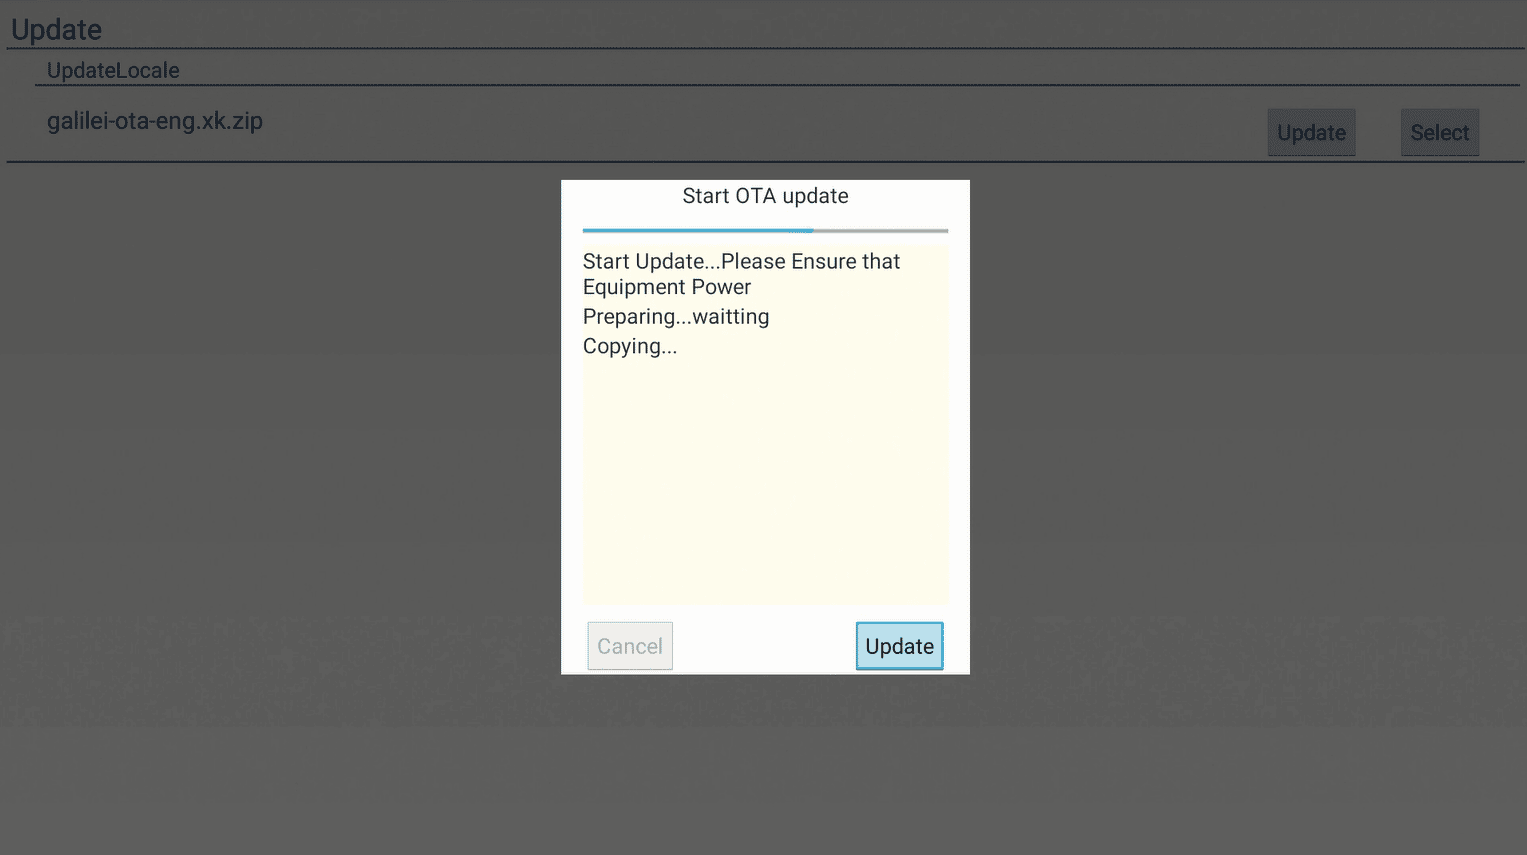
The device itself will update and reboot. It may take a while to boot up after the update – this is normal.
Your device will now be re-flashed/updated and ready to use!
