
This guide is applicable for the following mini PC models:
If you are looking to upgrade your Beelink U55, we at DroiX have put together a short guide to help you disassemble the unit and upgrade your device as soon as possible.
Step 1 – Remove the rear panel
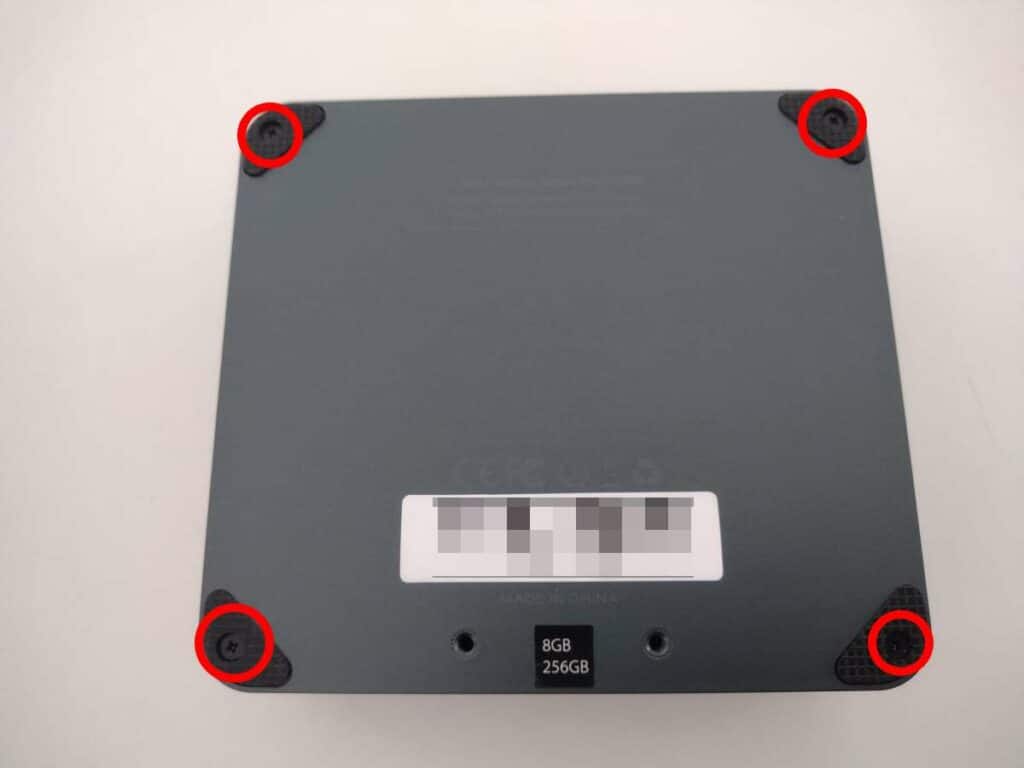
To access the mini PC, you will first need to remove the rear of the unit.
First, loosen the four screws located in the corners of the rear panel. The rear panel will then lift off with near-zero resistance. Be careful, as the SATA cable may be attached to the lid.
Step 2 – Replacing Components
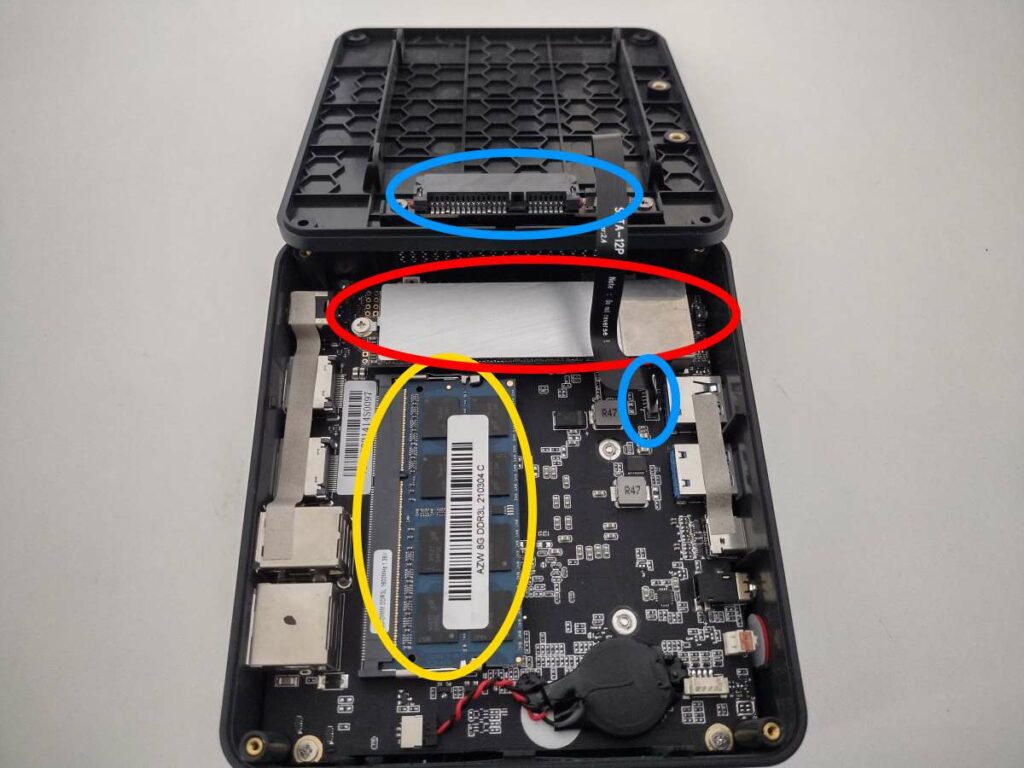
You will now be at the heart of the mini computer. From here, you can upgrade and replace the components as you wish.
To change the RAM (outlined in yellow), you lightly pull the securing clips on the sides of the RAM sticks outward, until the stick springs up by itself. You can then pull it out without resistance. The U55 and U57 feature a single stick, while the U59 can fit up to two sticks
To replace the M.2 SSD (circled in red), loosen the screw at the end of the socket, and you can then insert/remove the M.2 SSD as you please.
The light blue circle indicates the SATA interface. You would use this to link up a 2.5-inch HDD or SSD (which would be fixed onto the rear panel).
