

If you are looking to upgrade your MinisForum GK50, we at DroiX have put together a short guide to help you disassemble the unit and upgrade your device as soon as possible.
Step 1 – Remove the rear panel
To access the GK50, you first need to remove the rear of the unit.
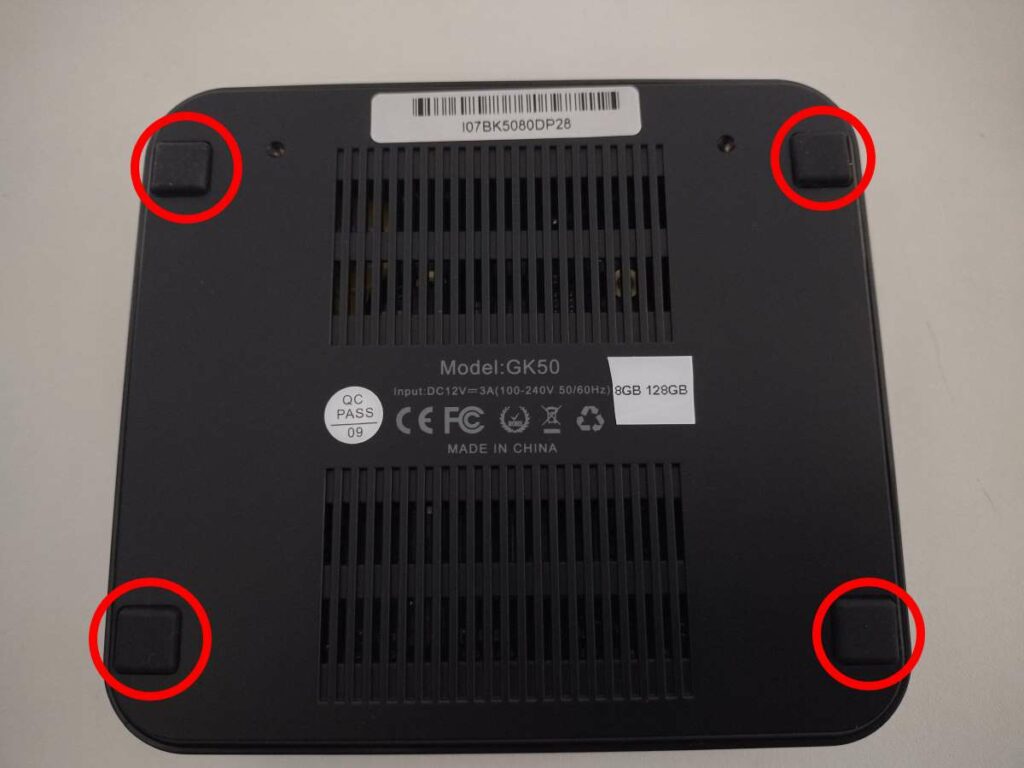
First, you will need to remove the rubber feet. You can use your nail to peel them off, or a dull, slim tool such as a butter knife. Exercise caution so that you do not damage the rubber feet.
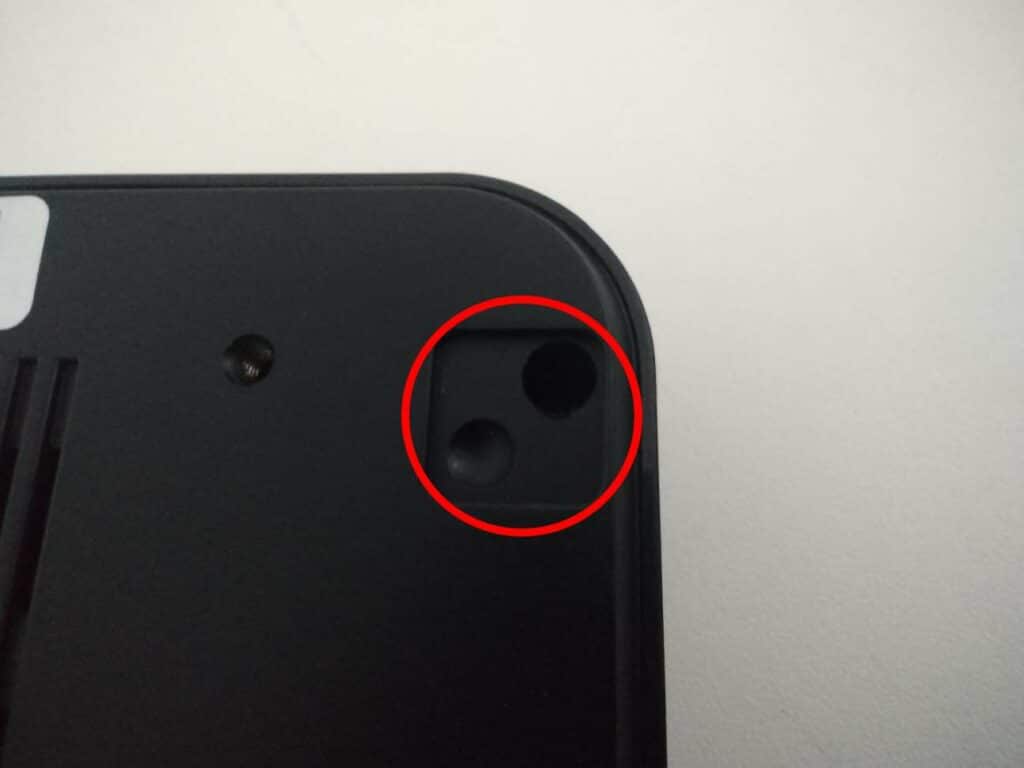
Once the feet are peeled off, they should still retain some amount of glue, so place them to one side and be careful not to accidentally stick them to anything.
Once the feet are removed, you can loosen the screws underneath as normal (using a regular cross-head screwdriver).
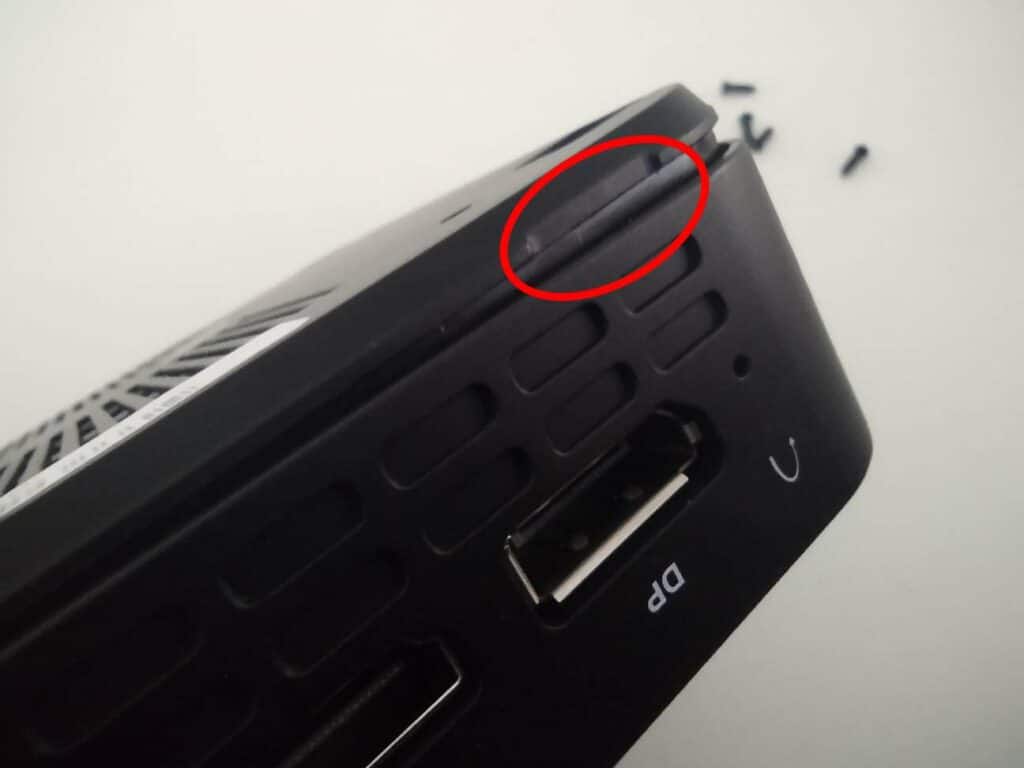
The rear panel is securely attached, so a prying tool such as a plastic spudger is necessary to remove it. In the rear of the device is a small indent that can be used to get some initial leverage. Once your tool is in, carefully move the prying tool around the edges of the device until the rear panel begins to “pop” away. Once this happens, it will be substantially easier to lift the panel off.
Step 2 – Replacing Components
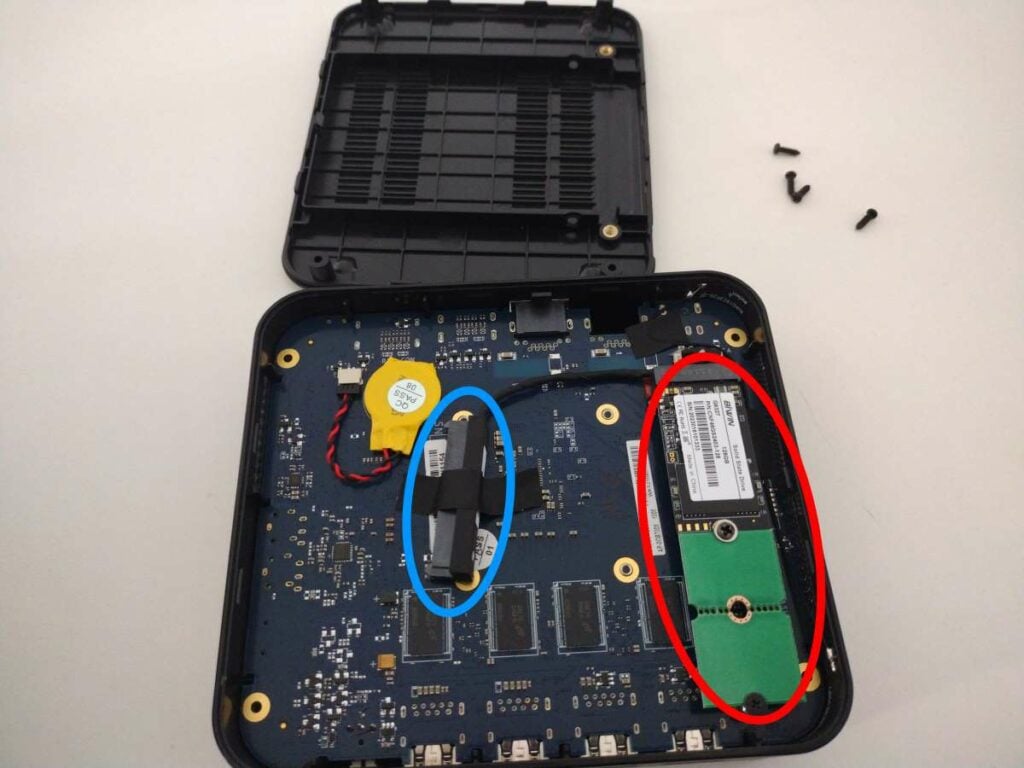
You will now be at the heart of the MinisForum GK50. From here, you can upgrade and replace the components as you wish.
To replace the M.2 SSD (circled in red), loosen the screw at the end of the socket, and you can then insert/remove the M.2 SSD as you please.
The light blue circle indicates a SATA connector which can be used to connect a 2.5-inch SATA SSD or HDD (which can then be secured to the lid of the device).
